How to pitch a D of E Tent in Four Steps
Posted by Gav Grayston.First Published Feb 2015; updated May 2023.
Doing the D of E but not pitched a tent before? We show you how to pitch a D of E Tent in four simple steps.
If your son or daughter is about to embark on their first Duke of Edinburgh Award expedition but hasn't pitched a tent before, they may benefit from reading these tips.
D of E Tents

Vango Mirage Cactus 300
For the Duke of Edinburgh Award, the kit is either 'personal', such as your clothes, or shared among a group. The tent you use for D of E is typically shared.
Tents are usually supplied by the organisation you are doing the D of E with, which your school, Scouts, Girl Guides, or similar, so you wouldn't normally need to buy a tent for your D of E expedition.
The tent we are showing here is the Vango Mirage 300, which is one of the tents the Duke of Edinburgh Award recommends groups use and is typical of the sort of tent that you may have on your D of E expedition.

Vango Mirage 300 Tent Layout
This is a three-person tent, so be prepared to share 😉
A great thing about this tent is that it has a sheltered porch providing somewhere to leave muddy boots and wet items so that you can keep the inside of the tent dry.
Taking the Tent on the Expedition
Although a tent isn't a personal item, you may be expected to carry the tent or parts of the tent, in your rucksack. (Click here to see a recommended D of E rucksack).
The Vango Mirage can be split between three, for example, with one person carrying the poles, another carrying the inner tent and pegs, and another carrying the outer tent.
Pitching the Tent
Your D of E tent will typically consist of the following items:
- Tent Poles.
- Waterproof Outer Tent, known as the flysheet.
- Inner Tent.
- Tent Pegs.
On most tents, you insert the tent poles into the flysheet (the outer waterproof part of the tent) to pitch it, then insert the inner tent. However, on some tents, you do the opposite and insert the poles to the inner tent, then secure the flysheet over the top.
It's essential to understand your tent type before starting to pitch.
The Vango Mirage 300 is like many tents, where you pitch the flysheet first.
It may take a while to pitch your tent the first few times, but it's quite simple, and you'll soon get the hang of it.
How to Pitch the D of E Tent Video
Here's a quick video we created for a quick look at how easy it is. More detailed step-by-step instructions are below the video.
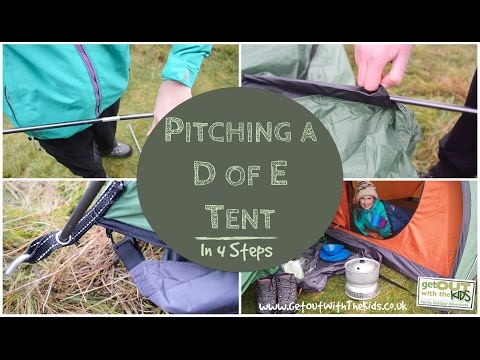
Step 1 - Put the Tent Poles Together
Slot the Tent Poles together
Slot the tent poles together.

Lay the Tent Poles out on the ground
Lay the tent poles out on the ground. In this case, there are just two straight poles and one angled pole. The tent you use may be slightly different.
Step 2 - Put up the tent
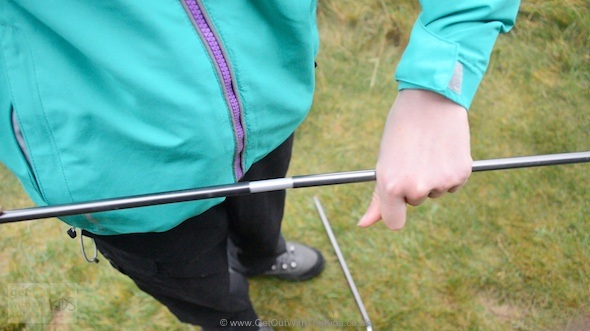
Position the Flysheet
Lay the flysheet (the waterproof outer part of the tent) on the ground where you want the tent to go.
Avoid placing the tent where there are rocks and stones, twigs and branches, or holes and dips in the ground.
Ideally, you want to place the tent somewhere flat.
If there is a slope, position the tent, so your head is lying up the slope when you sleep in it. Don't position the tent sideways onto the hill. Otherwise, you'll roll on top of one another when you are asleep.

Insert the poles into the sleeves
On the flysheet, you will find some sleeves.
Push the tent poles into the sleeves.
It is quicker to pitch the tent if you all help on one pole at a time instead of each doing your own tent pole. One person pushes the pole in; the other people help guide it through the sleeve.

Insert the ends of the pole into the eyelet
When the tent poles come out the other side of the tent, you will find a strap with a metal hole in it, called an eyelet.
Insert the end of the tent pole into the eyelet.
Once all the tent poles are in their sleeves, it's time for the tent to go up.
Starting with the longer poles, push the tent pole into the eyelet on the side of the tent, where you push the pole into the sleeve.
You'll notice it won't go in easily, and the tent pole will start to bend. Don't worry; it's supposed to bend.
It can be stiff and may take a few of you to do this.
If the tent pole is not going into the eyelet, check that the pole is not caught on the sleeve somewhere. If it still isn't going in, double-check that you have the poles in the correct sleeves.

The tent poles will bend and hold the tent up
Once the tent poles are bent and secured, you will have the main structure of the tent up.
Step 3 - Pegging Out

The bag of tent pegs
Locate the bag of tent pegs.

Insert the pegs into the straps at the bottom of the tent poles
Find the straps with the eyelets on which the tent poles are inserted. Give them a pull outwards so that the tent is nice and tight.
Insert a tent peg through the loop in the strap. These are your main 'anchor points' that will stop the tent blowing away.

Remember to peg the porch out if your tent has one
If your D of E tent has a porch, pull it out and insert the tent pegs.
Once you've done that, undo the guy lines (the ropes around the tent) and peg them out too.
Adjust the guy lines with the tensioner. This is the small plastic toggle on the guy line. You can move it to make the guy line tighter.
Go around to the anchor points (the straps with the eyelets) and adjust those if needed. You want the flysheet nice and tight, which helps water run off the tent if it rains.
Step 4 - Attach the Inner Tent

Attach the inner tent
Unzip the tent and get the inner tent. Spread it out on the tent floor.
The inner tent has toggles on it that go through hoops found on the inside of the tent.
Starting at the back of the tent, insert the toggles into the hoops at the bottom and then work your way up the inside of the tent until all the toggles are attached.
Your tent is now ready for you to set up your sleeping mat and sleeping bag.

The D of E Tent Pitched
Warning
We've shown the Trangia in the porch for this photo, but we wouldn't recommend you have a lit Trangia so close to the tent.
Remember
Your D of E tent may differ slightly from the Vango Mirage 300. The steps will be very similar to this, but read the instructions for your tent. Instructions are usually printed and attached to the tent's bag.