
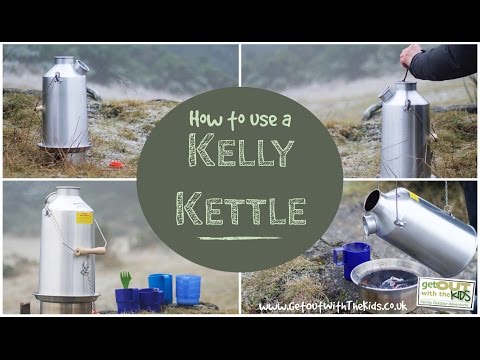
How to use a Kelly Kettle
Posted by Gav Grayston.First Published Jan 2015; updated May 2023.
The Kelly Kettle is a great way to boil water for camping, hiking, or picnics. We show you how to use one and which we recommend for families.
There's something quite satisfying about cooking with fire. I don't think it's just my 'inner caveman' either, but something that comes from deep within all of us.
However, building a fire is not always practical, especially if you just want a cuppa.
The solution: a Kelly Kettle.
What is a Kelly Kettle

A Kelly Kettle is an invention from the 1890s and provides a fast way to boil water using only a small amount of combustible material, such as twigs, dried grass, or pine cones.
It works like a chimney. A fire is lit in the base, and the hot flames travel up the chimney.
Water is stored within the walls of the chimney. As the chimney gets hot, so does the water.
Why use a Kelly Kettle
It's fun 😉
OK, it has more serious uses, but it is a fun way to make a brew on a picnic.

A frosty winter walk
On a frosty Sunday, we used our Kelly Kettle to make hot chocolate and the leftover hot water to help cook Sunday lunch! (OK, so we were eating pasta al fresco).

A frosty Sunday lunch
When camping, using a Kelly Kettle will save you some fuel. On a hike or at the beach, it would give you fresh hot water without the need for flasks or taking a gas stove.
A Kelly Kettle could also be used if you have a power cut, loss of gas, etc., at home.
When hiking or camping in more remote locations, a Kelly Kettle is a great way to boil stream water to eliminate harmful bacteria.
If you do this, let the water boil for at least 4 minutes. You may also wish to filter particles from the water before entering the kettle.
How to use a Kelly Kettle
Here's a very short video we made on how to use a Kelly Kettle.
Fill the Kelly Kettle with water (obviously), but don't over fill it as the water could boil over. Don't put the rubber bung or cork back in either, as it could cause the kettle to explode as the water expands into steam.
Start the process by making a small fire in the fire bowl in the base.
Any tinder can be used, from dried grass, birch bark, or newspaper.
Make sure you position the hole in the fire bowl to point into the wind. This makes a big difference.

Putting fuel into the Kelly Kettle
You can light the fire in the base or place the kettle over the top and light the fire through the small hole.
The first method makes it easier to light and start a fire, and the second method protects your fire if you are lighting on a windy or wet day.
Drop small twigs and other materials (such as pine cones) down the chimney.
When we took the pictures, it was cold, wet, and frosty, and so was all the available fuel.

The Kelly Kettle ready with boiling water
We used some rolled-up sheets of newspaper and cardboard to start the fire. Small bits of twigs and grass soon dried out and started to burn despite the conditions.
For this to work, ensure the hole in the fire bowl gets good air flow, placing the kettle higher if necessary.
We found it soon turned the kettle into a little furnace, and slightly damp twigs were soon burnt.
When hiking in the cold frosty air, the heat from the Kelly Kettle is a welcome addition.

Making a brew with the Kelly Kettle
When the water has boiled, use the handle and the chain to pour the water. Any spare water can be used to make sure the fire is out.
Take care when using a Kelly Kettle
Care must, of course, be taken with anything that uses a flame.
Fortunately, the actual fire on the Kelly Kettle is enclosed, but accidents can happen (i.e. don't use it in areas where there could be a forest or grass fire).
Do watch the kids around the Kelly Kettle. The combination of fire and boiling water could make for a very nasty accident.
Different sizes of Kelly Kettle
You can find three different sizes of Kelly Kettle, made in either aluminium or stainless steel.
Our (recommended) Kelly Kettle

Our Kelly Kettle with Bag
The Kelly Kettle we bought is the aluminium 'Base Camp'.
This is a good family-sized version, boiling up to 1.6 litres of water.
If you have a smaller family (there's five of us), you might want to consider the 'Scout' version that is slightly smaller.
All the Kelly Kettles come in either stainless steel or aluminium. We opted for the Aluminium Base Camp, which was lighter, cheaper, and had slightly more capacity.
The Kelly Kettle company also stated that the Stainless Steel version must be kept upright to avoid leaks, but the aluminium is more watertight when carrying water.

The Kelly Kettle heating water
The kettle came with a bag to transport it in, which is useful.
The family-sized 'base camp' model is 27cm high, so we used a larger backpack to transport it.
We shall probably use it camping, and for picnics when the car is nearby, but despite its size, it is lightweight and easy to carry.
Cooking with the Kelly Kettle

Kelly Kettle Pot Support in use.
With all the heat the Kelly Kettle generates, it's a shame to see it all go to boiling water.
The good news is that a pot stand can fit in the chimney (we've now ordered one) so that you can cook and boil.
Since the fire in the Kelly Kettle is not designed to be long-lasting, it is best used for food that can be cooked fast.

Hobo Stove in use
If you want a longer-lasting fire for more cooking, you can also get the Kelly Kettle Hobo Stove on top of the fire base.
With this addition, I can see the Kelly Kettle taking over the role of our Trangia for many things, and means some welcome hot picnics when we're out with the kids in colder weather.
Further Information
If you are thinking of getting a Kelly Kettle, here are some more links that you may find useful.